
Grouping collisions with Autodesk Navisworks

One of the most stressful things for a contractor in the BIM world is completing a collision report after a coordination meeting where hundreds of collisions have been detected. Added to this is the pressure of trying to fix these types of problems in the shortest possible time.
To avoid these types of problems, Autodesk Navisworks offers a very intelligent tool for grouping potential collisions based on objects that will change in the future. By grouping these collisions, we not only reduce the number of collisions displayed in the report, but we also offer consultants a better way to remedy those related to a particular item before moving on to the next stage.
The following steps show the procedure for grouping collisions in Autodesk Navisworks:
Note: Collision detection is only available in Navisworks Manager, so these steps do not work if you have a simulator.
1.Activate the collision test .
2. Click the Results button , as shown in Figure 1.
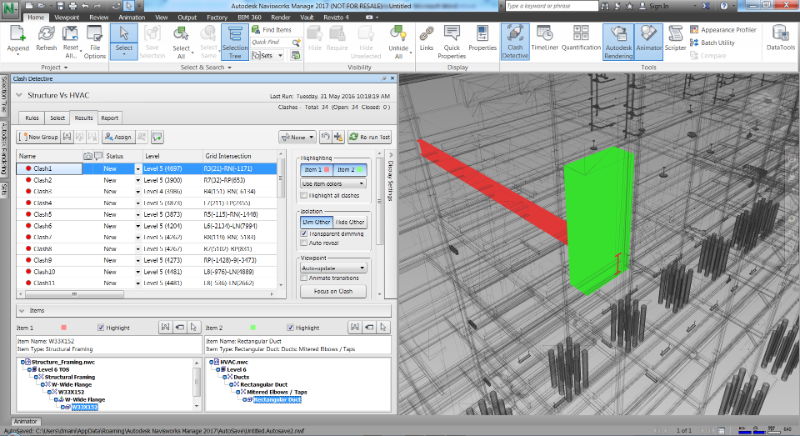
It’s worth noting that collisions are currently displayed individually. Thus, as shown in Figure 2 , the total number of collisions is 34.
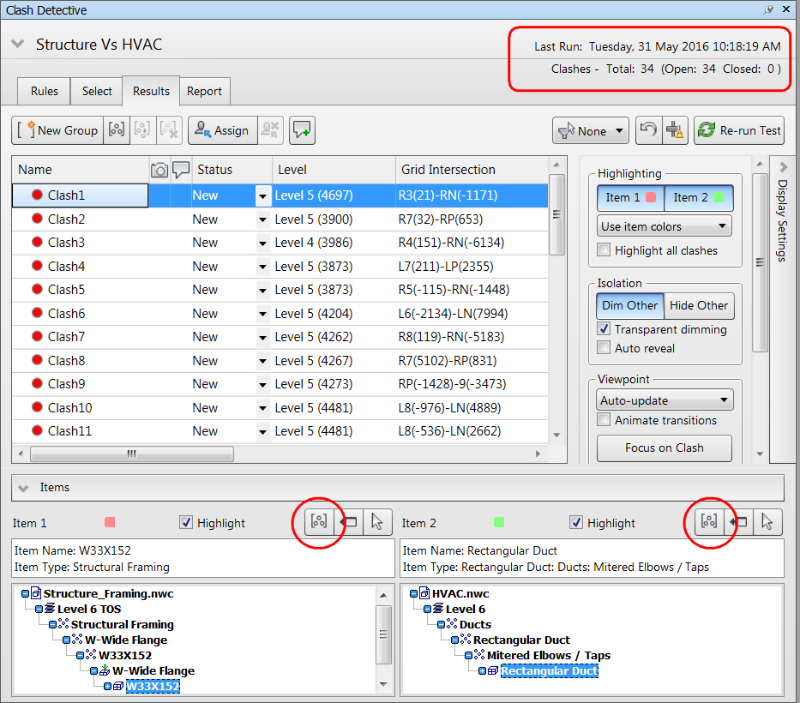
To group collisions, there are two buttons (called Item-Related Collision Groups ) available in the Item 1 and Item 2 areas , as outlined in the image above. The big question is whether to click the button in the Item 1 or Item 2 area. It’s important to consider which object will be moved. In the previous case, the collision is between the structure and the HVAC. During collision resolution, the movement will occur on the HVAC item, not the structural items. Therefore, we’ll click the button for Item 2 , since this area represents the HVAC items.
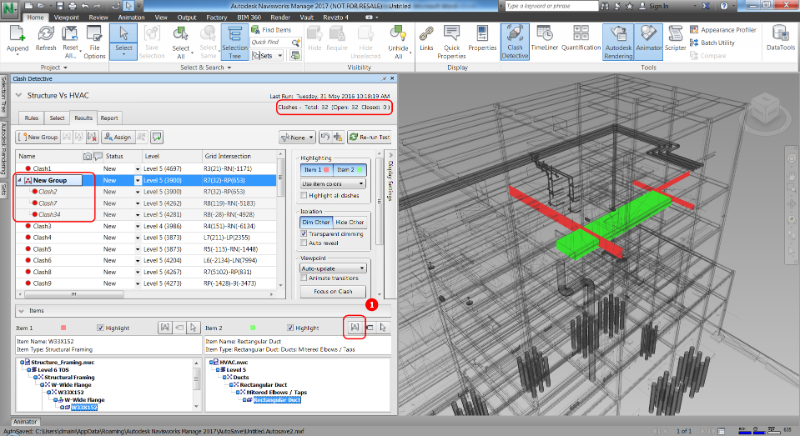
3.With the collisions highlighted in the Results area , clicking the Group Item Related Collisions button in the Item 2 area : all collisions related to the selected duct are grouped in the same place, as shown in Figure 3 , and the total number of collisions has dropped from 34 to 32.
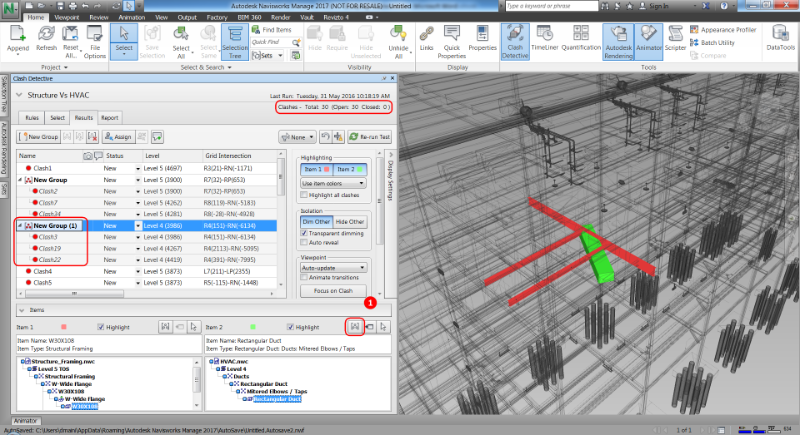
4.Similarly, by clicking on the collision and then clicking on the Item Related Collisions Group button in the Item 2 area again: all collisions related to the selected duct have been grouped together again, as shown in Figure 4, and the number of collisions decreases again from 32 to 30.
5. Repeat the process for the remaining individual cases. It’s worth noting that when grouping a certain number of collisions, there may be objects that are only related to one. In this case, you can destroy the group by clicking the Explosion Group button to the left of the Assign button , just above the results in the Results area .
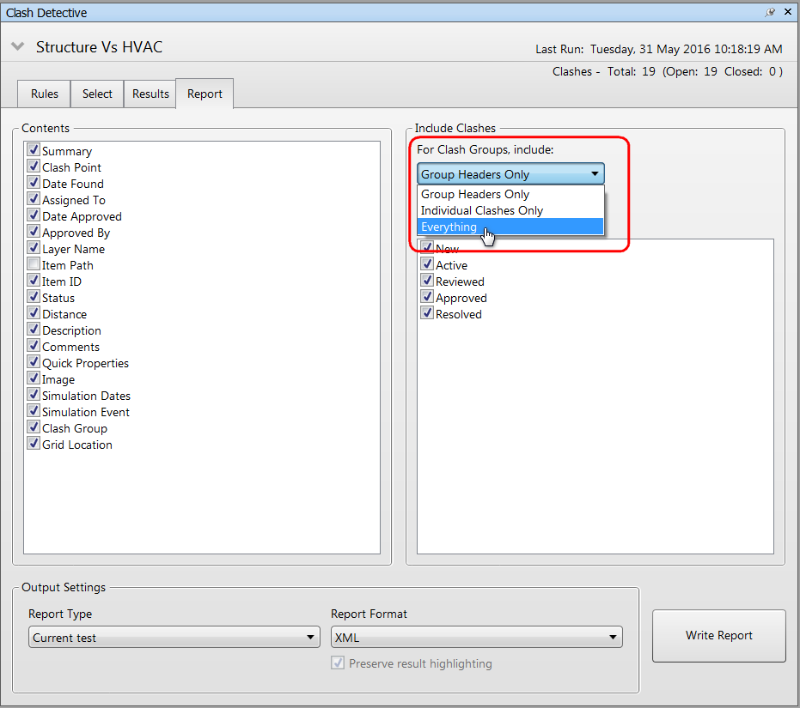
Now, once all the collisions have been grouped, it is extremely important to select the right option while generating the report.
6. When generating the report, it’s necessary to include the entire collision group in a single list. Otherwise, only the group headers will be included.
Hopefully, by reducing the total number of collisions and grouping them intelligently, we can make the task of fixing them much easier for the consultant.
Now, if we want to go a step further, we can use an interesting Navisworks add-in called iConstruct . It includes a module called Clash Manager that allows you to group collisions based on grids and levels, or any other smart property that can be read from a Navisworks model.


